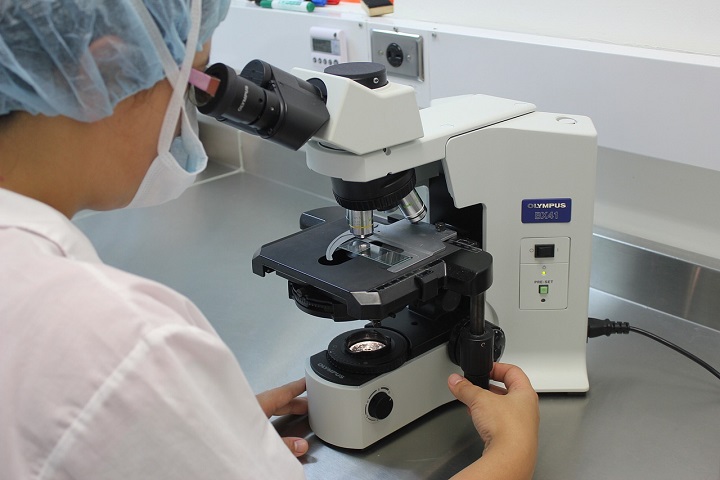
Microscope
A Brief Guide – Maintenance and Care of the Microscope
Microscopes with digital cameras may find the images produced degrading in image quality. A Brief Guide – Maintenance and Care of the Microscope.
As the years have gone by, several procedures have been recommended to maintain microscope quality but many users still are not sure what is the best way to go about it. A better cleaning method changes depending on the optical surface, as well as the substance that needs to be removed as studies on a microscope in Singapore, have shown.
If a microscope remains unused over a long period the quality of images produced by it will reduce as will the quality of a microscope that is used regularly since contaminants build up and may not fully clear up when cleaned.
Some of the dirt may sometimes come from the environment, like dust, but other times contaminants are introduced by the people who use the microscope in areas in contact with the body such as eyelashes, hands, and areas where moisture is captured by breathing on it over time. Problem areas include:
- Both sides of the coverslip
- The outside of the front lens of the objective
- The microscope slide
- Glass surfaces that come into contact with the hands in the path or the light
- The upper lens of the condenser
- Both surfaces of the eyepiece
- The reticule’s upper surface
- The outer glass coverings where light exits
- The protective cover and surface of the camera sensor
The front lens of the objective is more sensitive to light than other optical surfaces as are the optical elements near or at the conjugate field. Objects seem to appear in sharp focus when imposed on the specimen image. The higher quality of the optical components, the more blemishes are likely to interfere with the findings.

For all the dry objectives, a greater danger of soiling the lens at the front is presented when the free working distance and surface area of the concave front lens happen to be smaller. The immersion objectives front lens needs to be cleaned and its residue removed before applying fresh immersion fluid to prevent blurred images from new and old intermission fluid mixing.
Even though the fluid’s use is necessary for peak performance, improper use or failure to remove it immediately after each use can lead to serious contamination of the specimen and may cause damage to the microscope and improper findings.
Microscopes with digital cameras may find the images produced degrading in image quality because of contamination on filter elements used in the adapter of the camera and on the optical glass window put in to seal the housing of the camera and protect the charge-coupled device or the complementary metal oxide semiconductor.
If dark specs can be seen in digital images that are not on the specimen plane, the most likely cause is contamination on the image sensor or any other filter service as shown in the microscope in Singapore and other product studies carried out. The manufacturer’s recommendations about cleaning the microscopes should be taken into consideration while cleaning them and the cameras whenever dirt is on them.
Helpful Resources:
1. 16 Best (free) AMP – (Accelerated Mobile Pages) WordPress Plugins
2. 16 Best Free SEO WordPress plugins for your Blogs & websites
3. Riverdale Cast List For The TV Show Riverdale
How AI Is Reshaping Digital Marketing Strategies in 2026

Maximizing ROI with HCI: Real‑World Benefits for IT Leaders

Search Atlas: What the Platform Does and Why It Leads in Local SEO
How Alert Fatigue Is Increasing Cyber Risk

How Apps Can Make Employee Communication A Lot More Simple

The Global Awakening: Understanding Gen Z’s Voice 🌍🎤

Canva AI: Your Creative Co-Pilot, Explained 🎨🤖

DALL·E AI: Redefining Creativity with Artificial Intelligence 🎨🤖

Runway ML: The Future of AI-Powered Creativity 🎥✨

🎨 Midjourney: The Complete Guide to AI Art Generation in 2025

Buy IG likes and buy organic Instagram followers: where to buy them and how?

100% Genuine Instagram Followers & Likes with Guaranteed Tool

7 Must Have Digital Marketing Tools For Your Small Businesses

Instagram Followers And Likes – Online Social Media Platform
Use of 3D Printing in Injection Molding

Top 25 Best SolarMovie Alternatives Updated List

13377x Original Site: 1337x Official Site, Proxy Sites, Movies, Torrents

Principles of Good Software Engineering

How To Get Started With Artificial Intelligence

Tamilrockers Alternatives: TamilRockers Proxy and Mirror Sites [working]
-
Instagram5 years ago
Buy IG likes and buy organic Instagram followers: where to buy them and how?
-
Instagram5 years ago
100% Genuine Instagram Followers & Likes with Guaranteed Tool
-
Business7 years ago
7 Must Have Digital Marketing Tools For Your Small Businesses
-
Instagram6 years ago
Instagram Followers And Likes – Online Social Media Platform