Internet
3 Simple & Quick Ways To (REALLY) Hide Your IP
3 Simple & Quick Ways To (REALLY) Hide Your IP, How to change your IP address, Use a VPN – Reliable & Secure, Use a Proxy Server – Slow & Unsecure & Use TOR
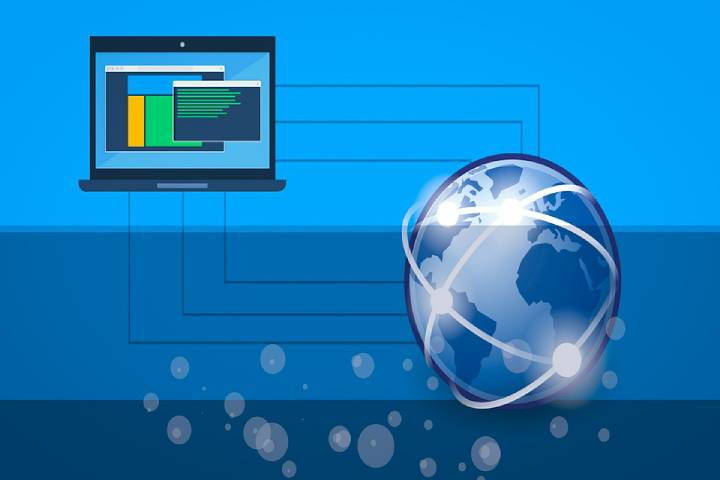
There are many reasons why you’d want to hide your IP address – maybe for privacy and security reasons, to access restricted content, to work around IP bans, for online freedom, etc. Fortunately, it’s quite easy to change your IP address. In this guide, we’ll show you three practical ways to hide your IP address and secure your online connection.
Table of Contents
1. What is an IP Address?
For devices to communicate via a network, each of these devices must have an identifier. This identifier works just like your street address. It will be required to send a message, and it will be necessary to receive news. Your device’s network identifier is what is known as the Internet Protocol (IP) address.
This IP address is specified by your ISP whenever you want to connect to the internet. Unfortunately, anyone who can see your IP address can know your location and your ISP. The same address can also be used to profile you on the internet and to target you with adverts.
And although we don’t have much control over the IP addresses we are assigned, there are some ways we can force a change. To know the IP address you currently have, you can do a simple IP lookup.
You will get something like this: 123.45.67.89
2. How to change your IP address
a) Use a VPN – Reliable & Secure
Using a Virtual Private Network (VPN) is the best way to improve your IP address, and it’s the method we recommend.
The initial thing you want to do is to choose a VPN service provider. There are premium and free VPN services, but we would recommend using a premium service. Free VPNs can often do more harm than good – for example, by selling your data to third parties.
After choosing a VPN, please create an account on their website and then download a copy of the VPN software. You can then install it and log in using your credentials. You will get several server options to connect to. Once your connection is established, your IP address will automatically change. You can confirm this by doing another IP lookup.
To change your IP address, a VPN encrypts and then routes your traffic through a secure tunnel to a server of your choice. This traffic is then decrypted, and your IP address is spoofed with a new IP address reflecting the location of your new server. Every internet service will now think they are communicating with the VPN server, and so they won’t be ready to tell your physical location or your ISP.
Apart from changing your IP address, a VPN will also provide privacy and security since your traffic is encrypted. Your ISP, government, and snoopy agencies will not be able to tell the sites that you are accessing or the activities that you are carrying out on the internet.
You will also be able to use the VPN to unblock streaming services such as Netflix, Hulu, Disney +, etc.
b) Use a Proxy Server – Slow & Unsecure
Just like a VPN does, a proxy server comes in between your ISP and the internet. When you are connected, all the data you send is intercepted by the proxy server. The proxy server then replicates everything and sends the request to your intended destination. When it gets the response from the website you wanted to access, it then forwards this information back to you.
Since the proxy server is what was used to connect to the internet, its IP address will be used instead of yours. This means that you have changed the IP address you will use to access the internet.
However, unlike VPNs, proxy servers do not encrypt your traffic, and they lack authentication, so you will be susceptible to man-in-the-middle attacks as well as surveillance.
Further, proxy servers intercept traffic on a per-application basis. This indicates that also if you hide your browser traffic, you can still be exposed through other apps. You can easily connect
c) Use TOR – Secure but very slow
Tor is the other reliable option for changing your IP address. It is named after the original project (The Onion Router) and is also popularly referred to as the deep/dark web. Tor provides privacy and security by routing your traffic through several nodes (layers like an onion). Each of these nodes encrypts your traffic and then changes your IP address to make you anonymous.
To get started with Tor, all you need to do is download the Tor browser. You can before use it as a regular browser. However, your connection will be significantly slowed.
3. Wrap up
Changing your IP address helps enhance privacy and anonymity. It also does more than that as it can let you fake your actual location with a virtual one. And although the process may seem complicated, it’s quite easy. The above three methods will help you change your IP address within just a few minutes.
How AI Is Reshaping Digital Marketing Strategies in 2026

Maximizing ROI with HCI: Real‑World Benefits for IT Leaders

Search Atlas: What the Platform Does and Why It Leads in Local SEO
How Alert Fatigue Is Increasing Cyber Risk

How Apps Can Make Employee Communication A Lot More Simple

The Global Awakening: Understanding Gen Z’s Voice 🌍🎤

Canva AI: Your Creative Co-Pilot, Explained 🎨🤖

DALL·E AI: Redefining Creativity with Artificial Intelligence 🎨🤖

Runway ML: The Future of AI-Powered Creativity 🎥✨

🎨 Midjourney: The Complete Guide to AI Art Generation in 2025

Buy IG likes and buy organic Instagram followers: where to buy them and how?

100% Genuine Instagram Followers & Likes with Guaranteed Tool

7 Must Have Digital Marketing Tools For Your Small Businesses
Instagram Followers And Likes – Online Social Media Platform

Use of 3D Printing in Injection Molding
Top 25 Best SolarMovie Alternatives Updated List
13377x Original Site: 1337x Official Site, Proxy Sites, Movies, Torrents

Principles of Good Software Engineering

How To Get Started With Artificial Intelligence

Tamilrockers Alternatives: TamilRockers Proxy and Mirror Sites [working]
-
Instagram5 years ago
Buy IG likes and buy organic Instagram followers: where to buy them and how?
-
Instagram5 years ago
100% Genuine Instagram Followers & Likes with Guaranteed Tool
-
Business7 years ago
7 Must Have Digital Marketing Tools For Your Small Businesses
-
Instagram5 years ago
Instagram Followers And Likes – Online Social Media Platform